
As a second project of my RSoC internship, I worked on integrating the Rizin Mark API into Cutter to visually show the presence of marks in the Hexdump widget.
You can find the write-up of my first project here
What Are Marks
Marks in Rizin let you label a range of memory addresses with a name, comment, or even a color. They’re a way to keep track of important regions in a binary.
Refer to RSoC 2025 - Adding Mark API for more details about Marks.
Implementation
For now, Marks are only available in the Hexdump widget
Adding, Editing and Removing Marks
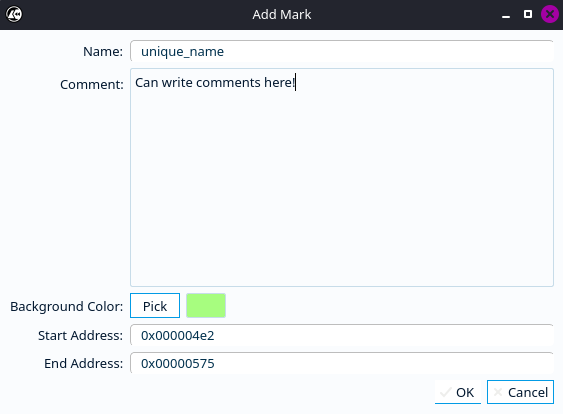
To make working with marks more user-friendly, we introduced a dedicated dialog in Cutter. This dialog, implemented in MarkDialog, takes user input and communicates with the Core() instance to add or edit marks. Through it, users can visually set the start and end addresses, give the mark a name, add a comment, and even pick a color.
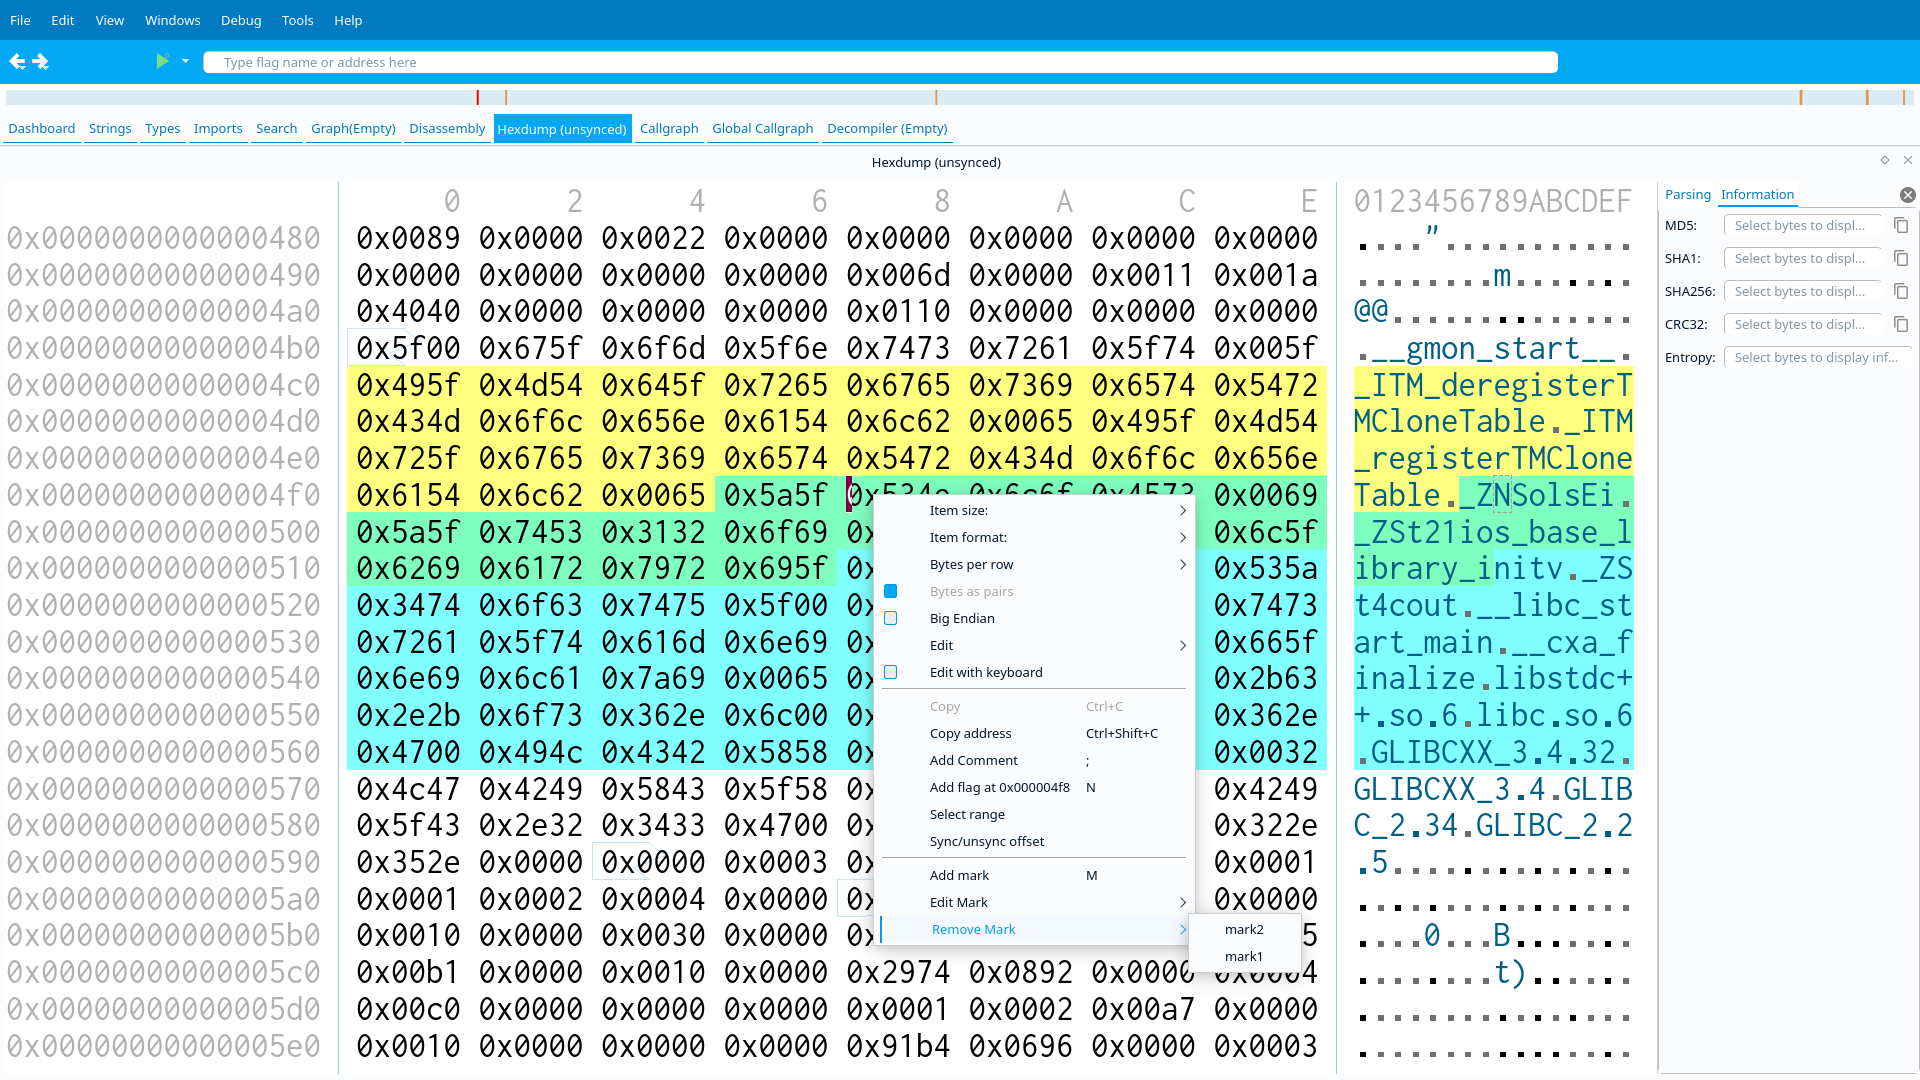
Actions for adding, editing, and removing marks are integrated into the context menu.
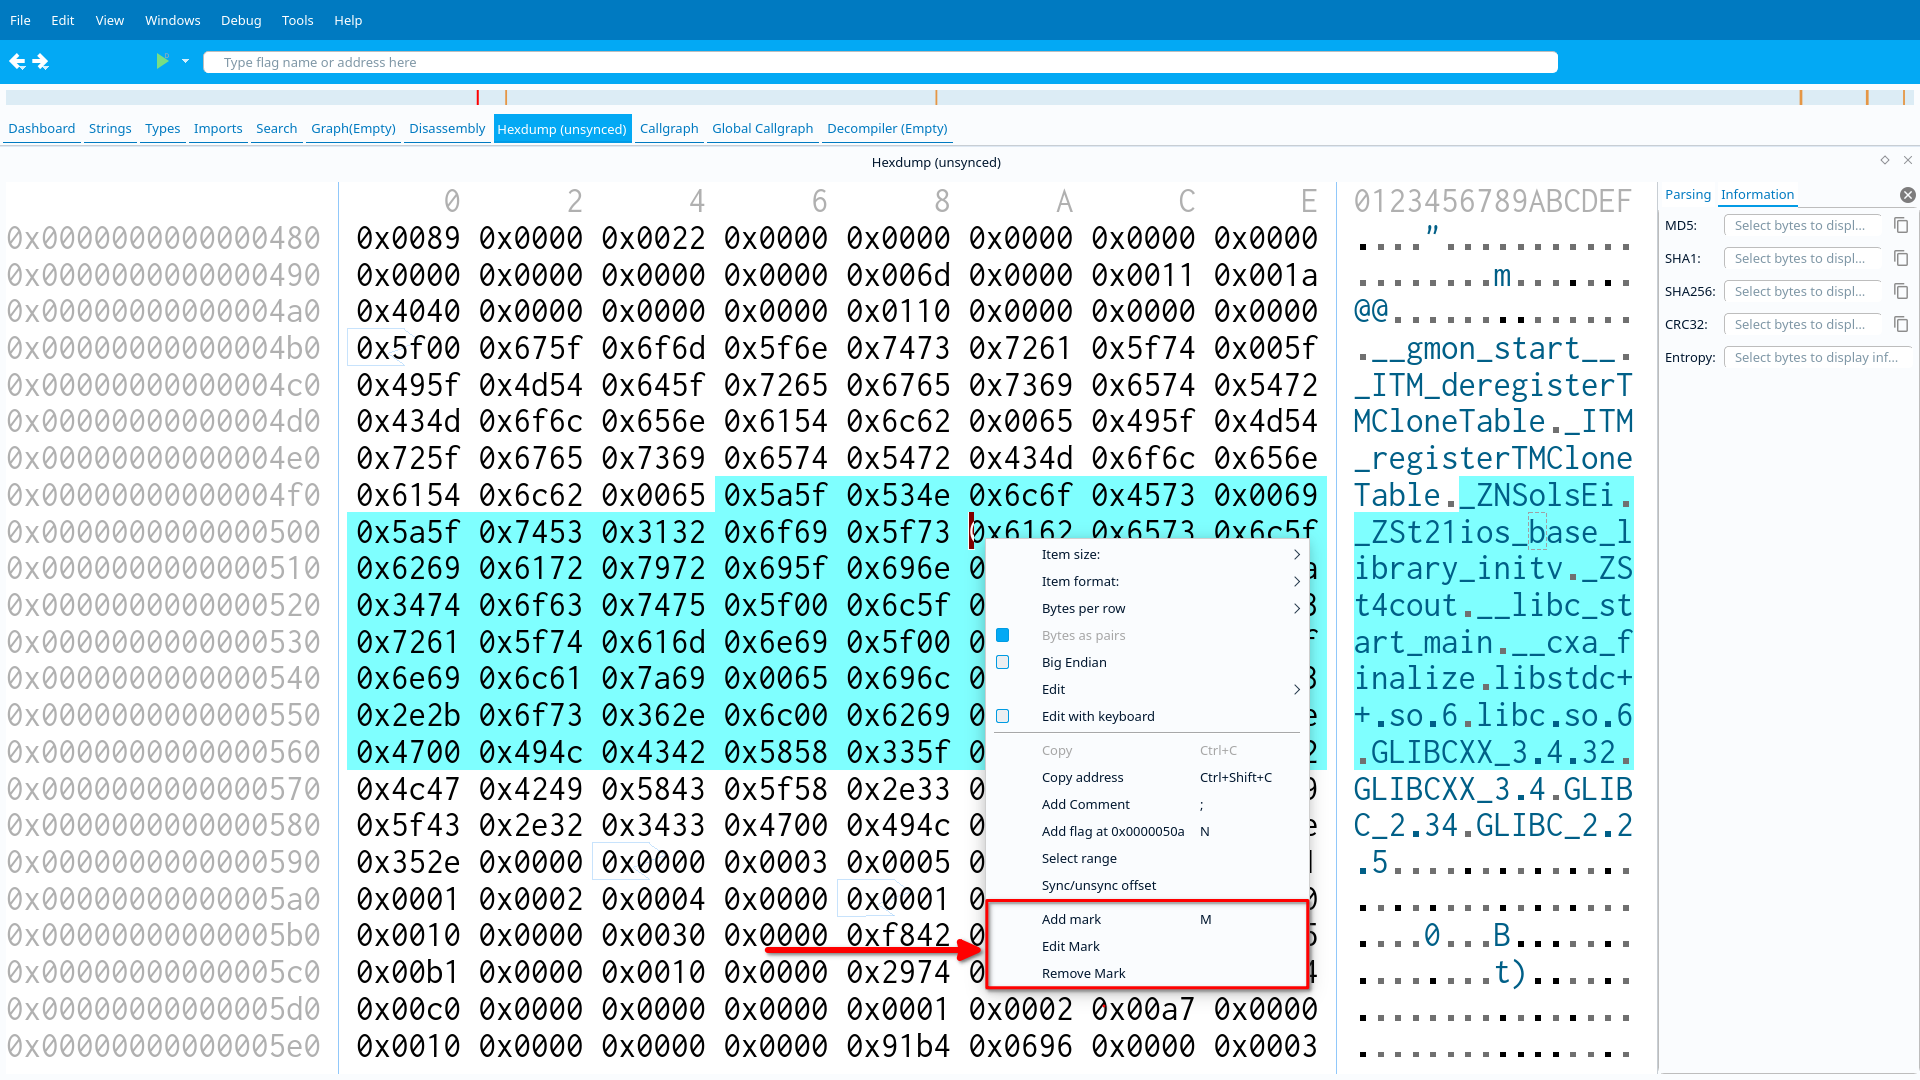
A default shortcut key M was also introduced in DefaultShortcuts to quickly trigger the Add Mark action.
Visualizing Marks
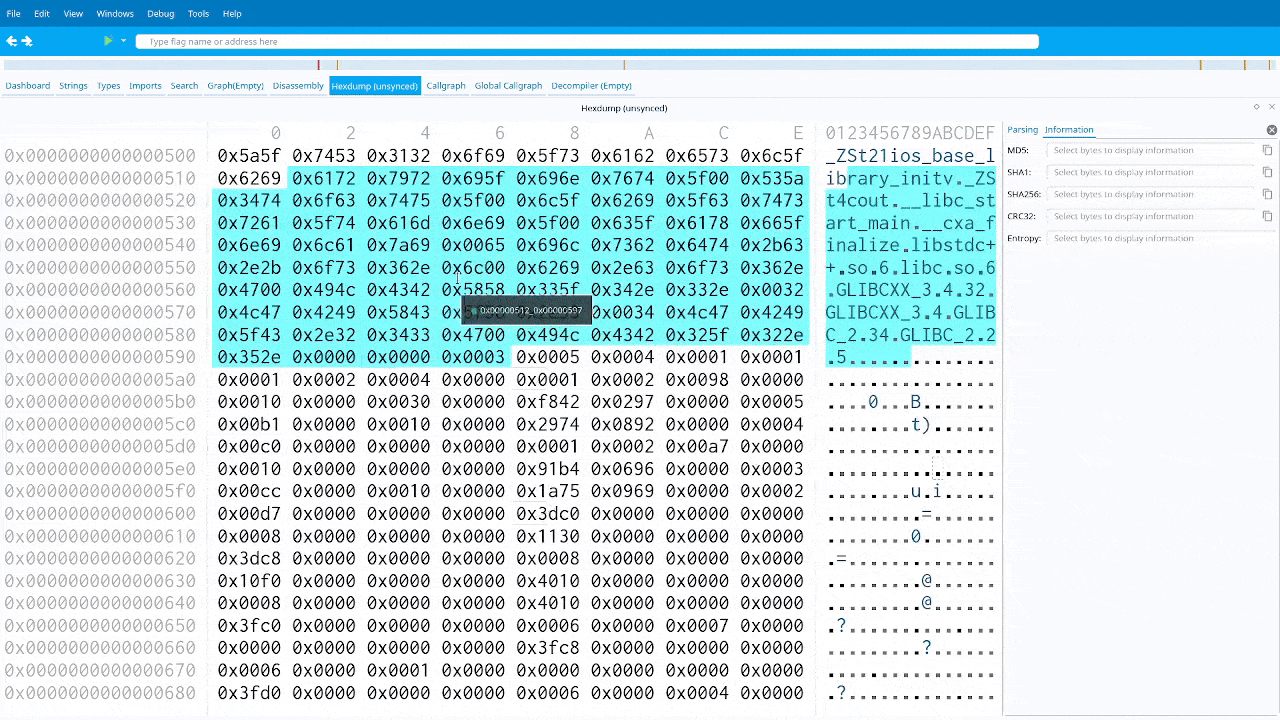
Once adding and editing marks was in place, the next step was to give them a proper visual representation. This happens directly inside the Hexdump widget. Before drawing the Data bytes and ASCII characters, the widget first queries the Core() instance for all mark items that overlap with the current viewport. These are collected in a MarkDescription container.
struct MarkDescription
{
    RVA from;
    RVA to;
    QString name;
    QString realname;
    QString comment;
    QColor color;
};
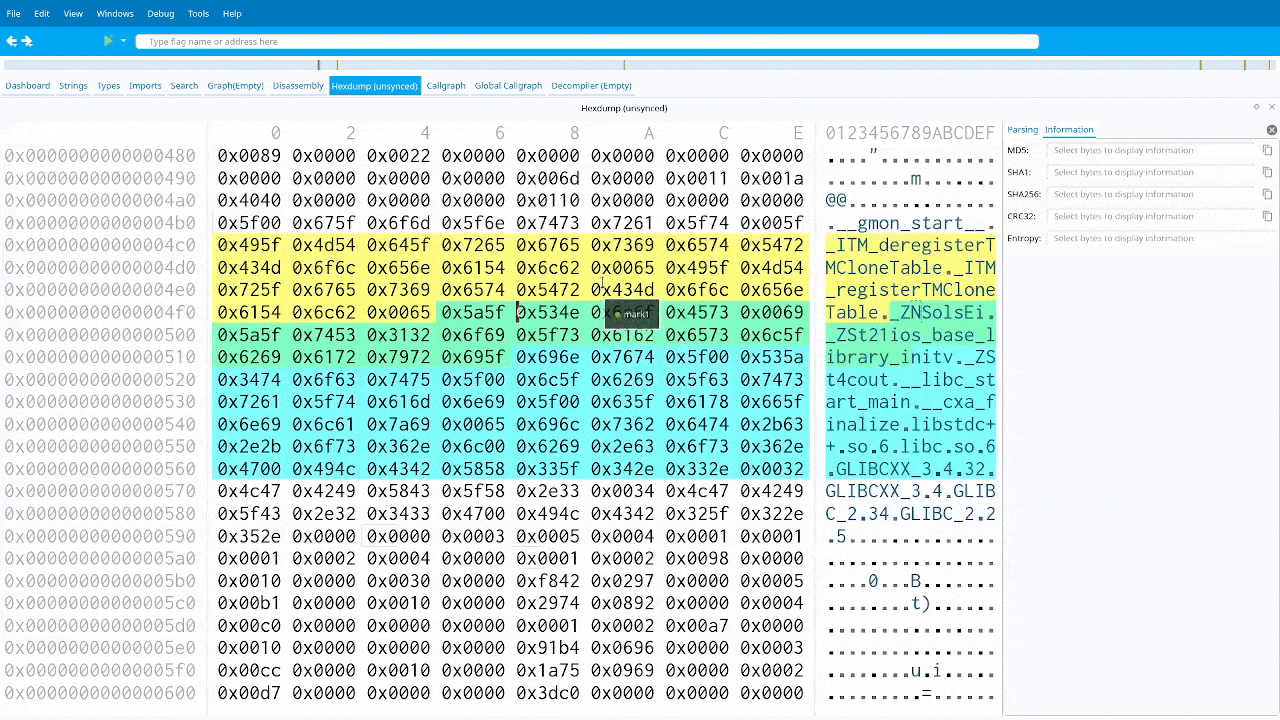
Each mark is then rendered in its assigned color, and finally the Data bytes and ASCII characters are drawn on top so the marks integrate smoothly into the Hexdump view.
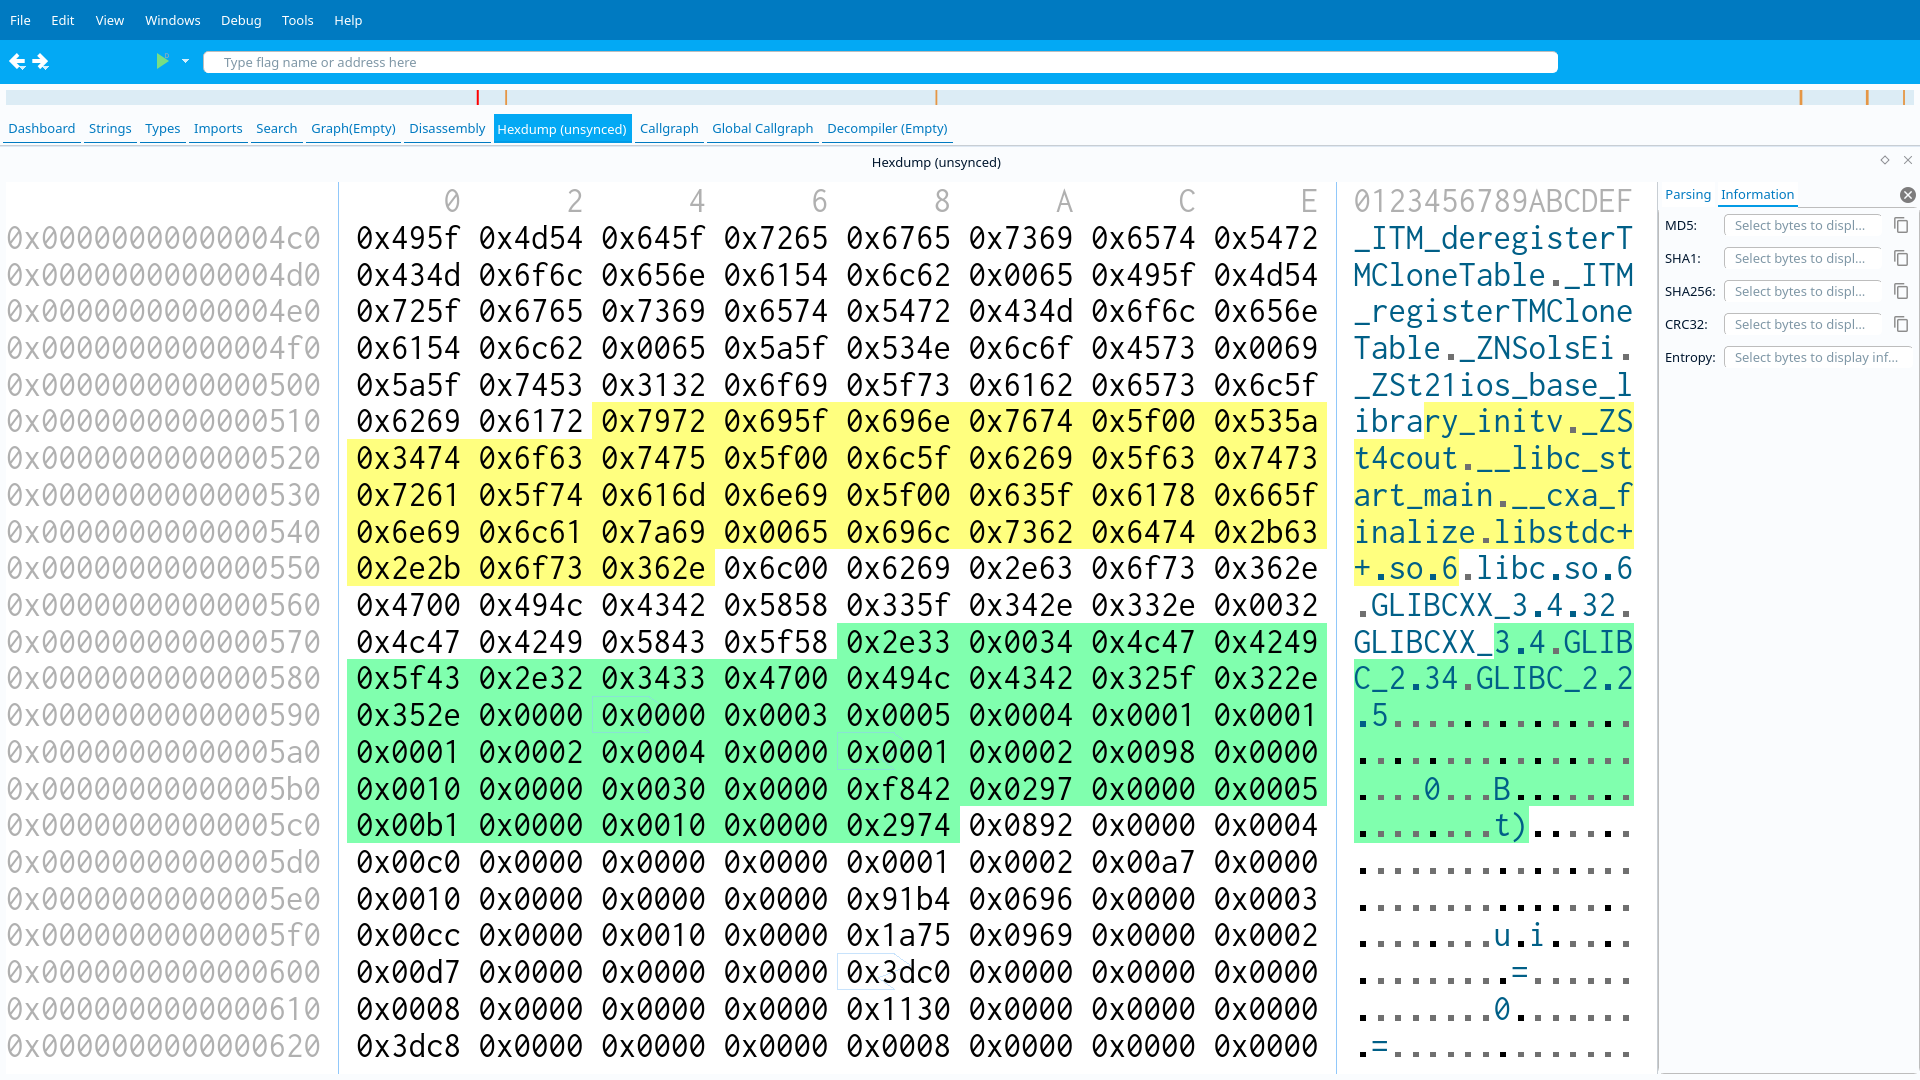
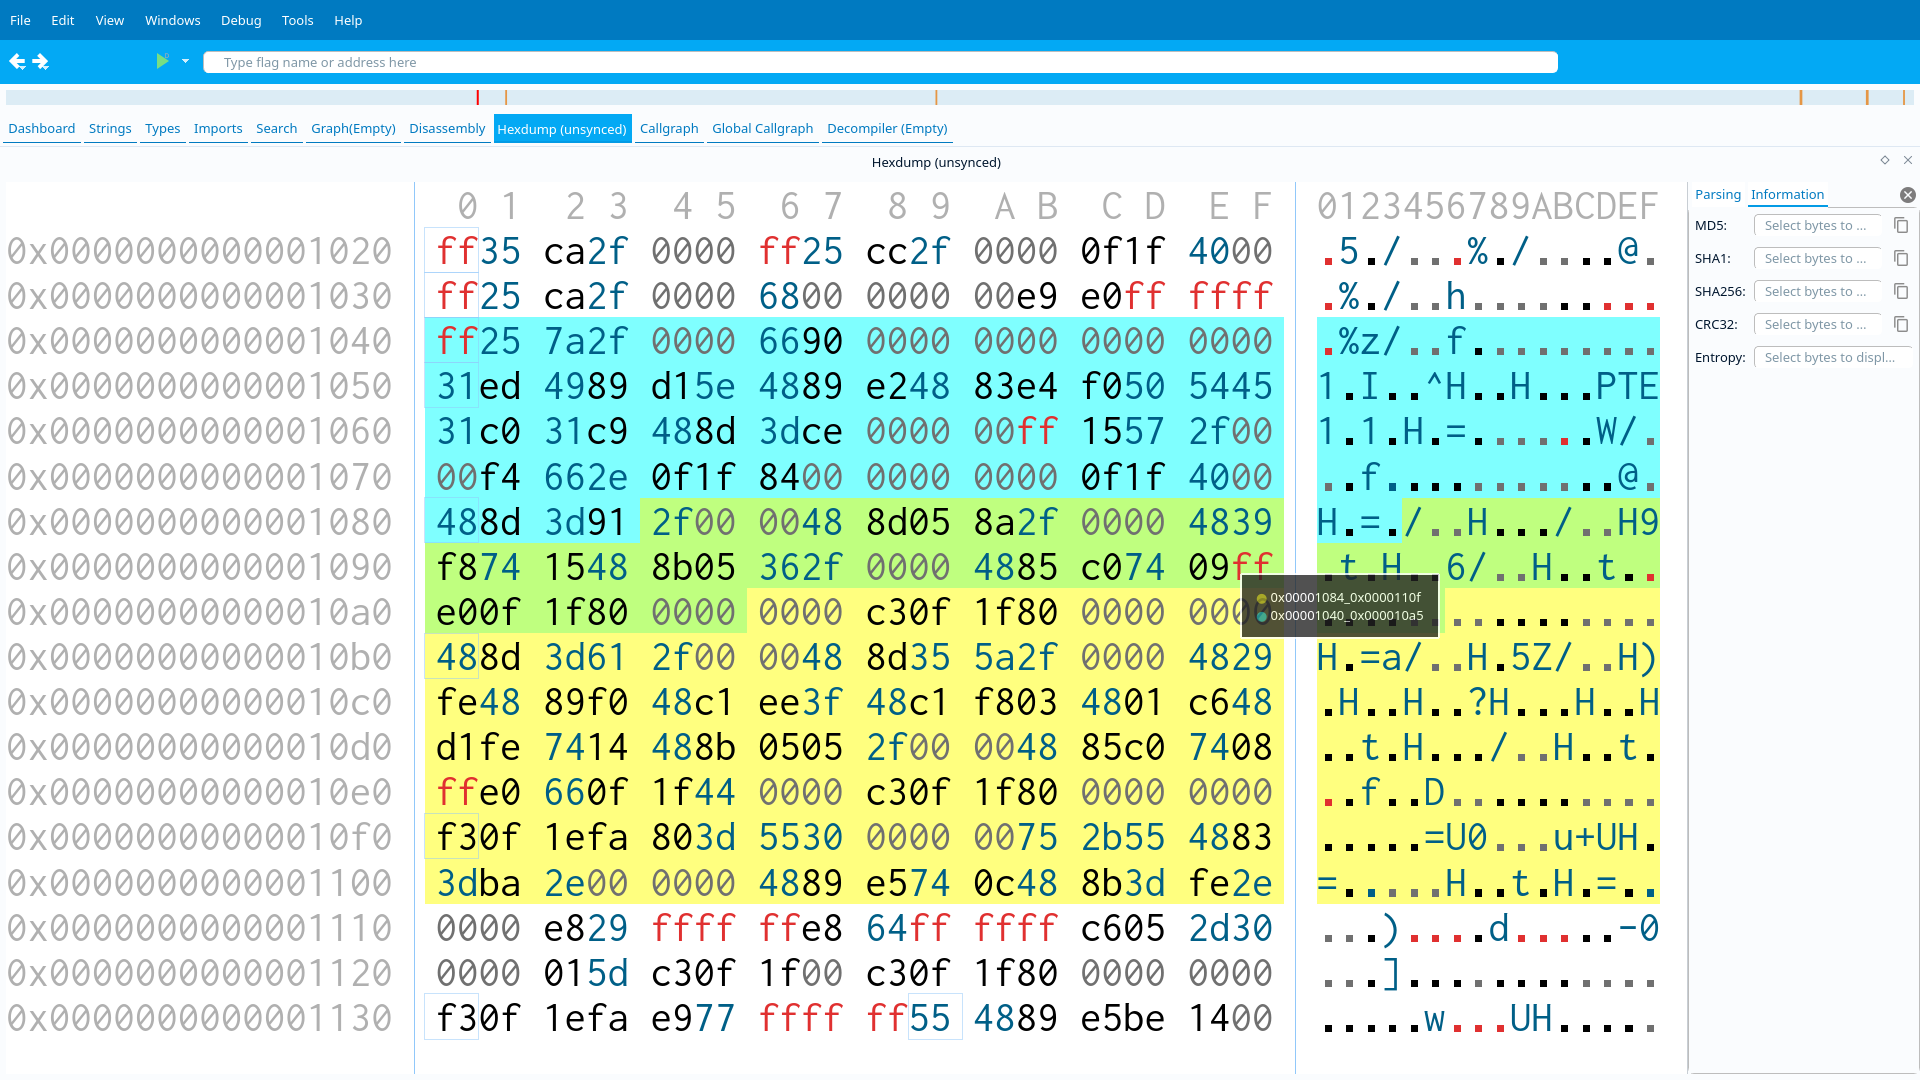
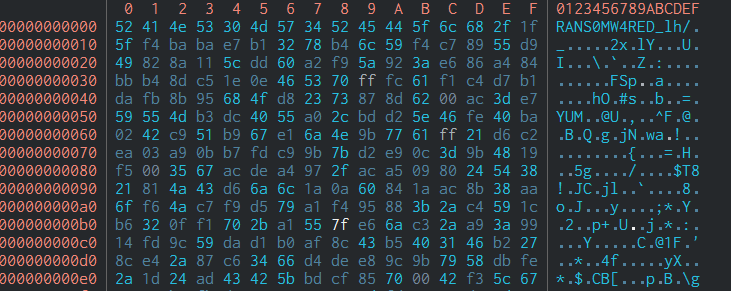
Blending Overlapping Marks
To handle overlapping Marks, their colors are blended to create a combined color for the overlapping region. This is achieved by setting the alpha of each mark’s color to 50%, allowing the QPainter object to automatically mix them when drawing the overlapped areas.
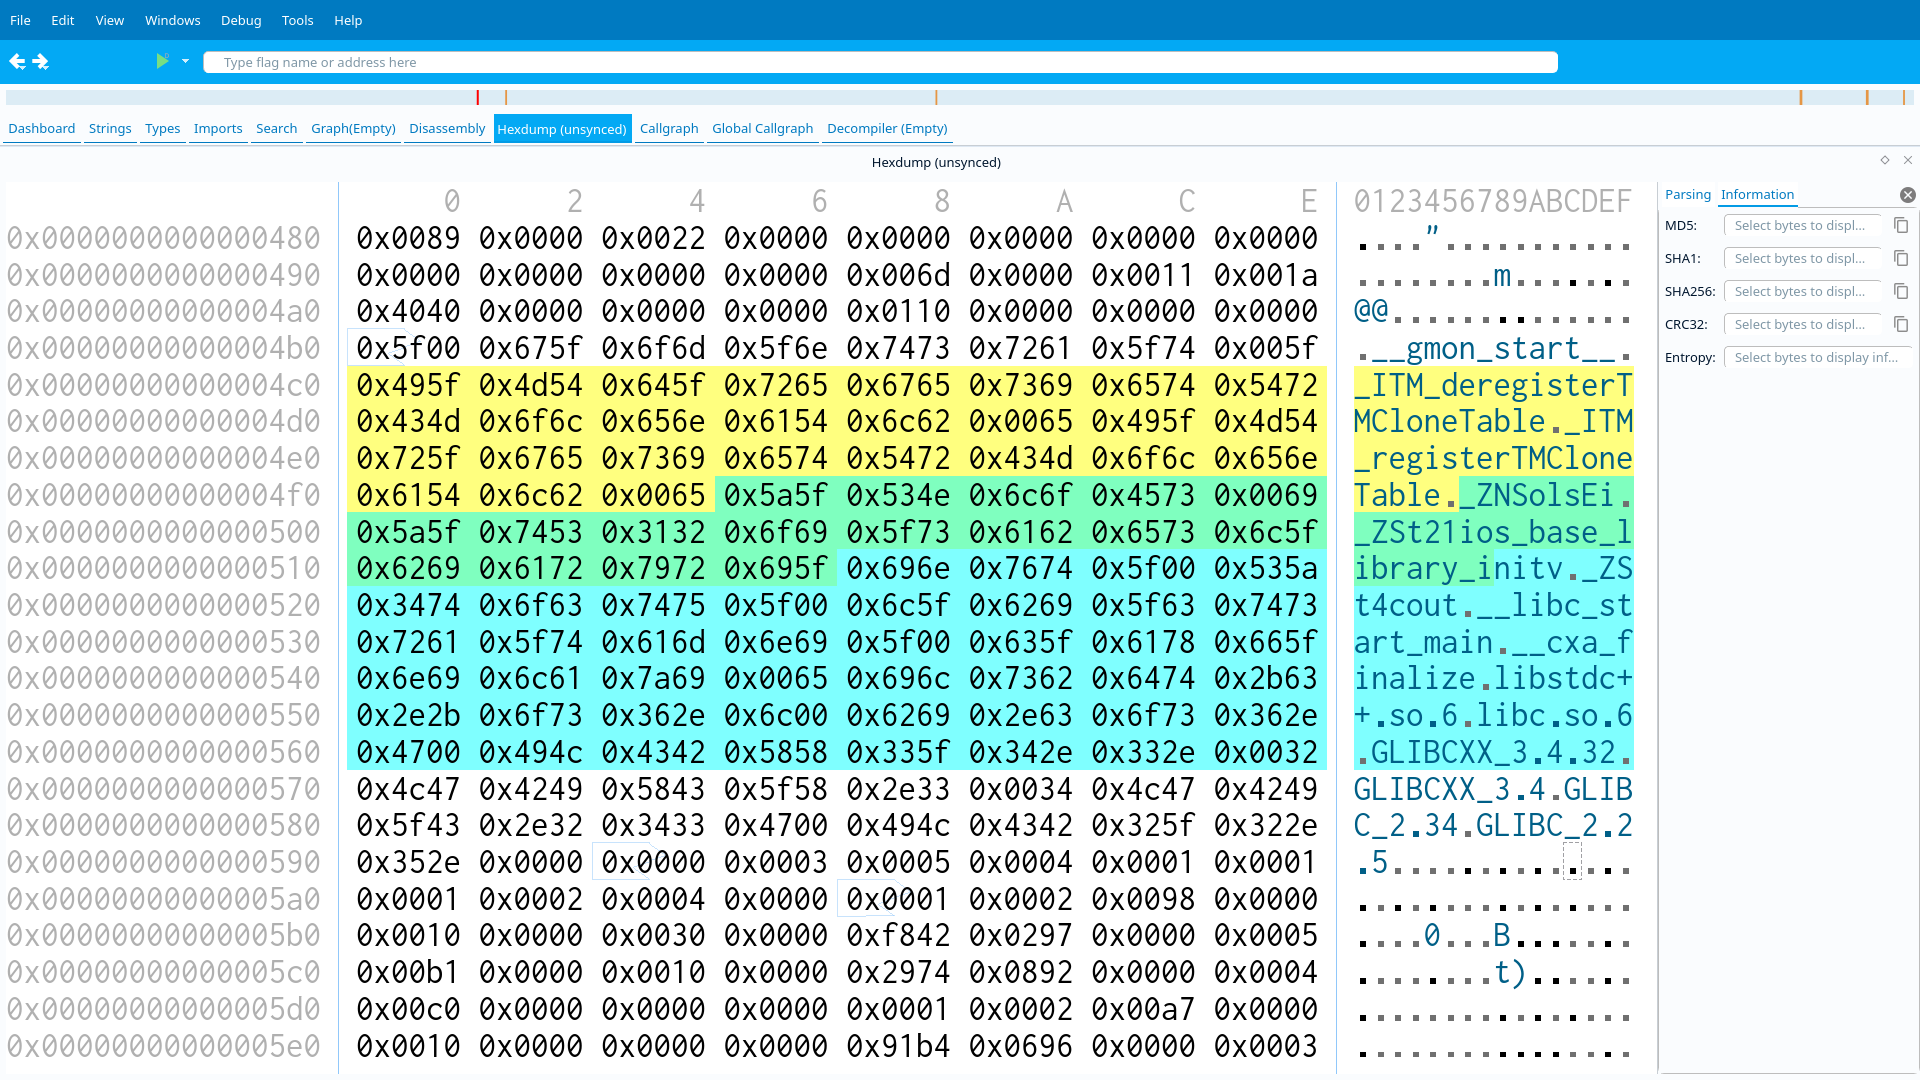
Here, the overlapping region is highlighted by a subtle green color.
Tooltip
To help distinguish between different marks, we use QToolTip. When the user hovers over a marked address, a tooltip appears showing a small colored circle along with the mark’s name.
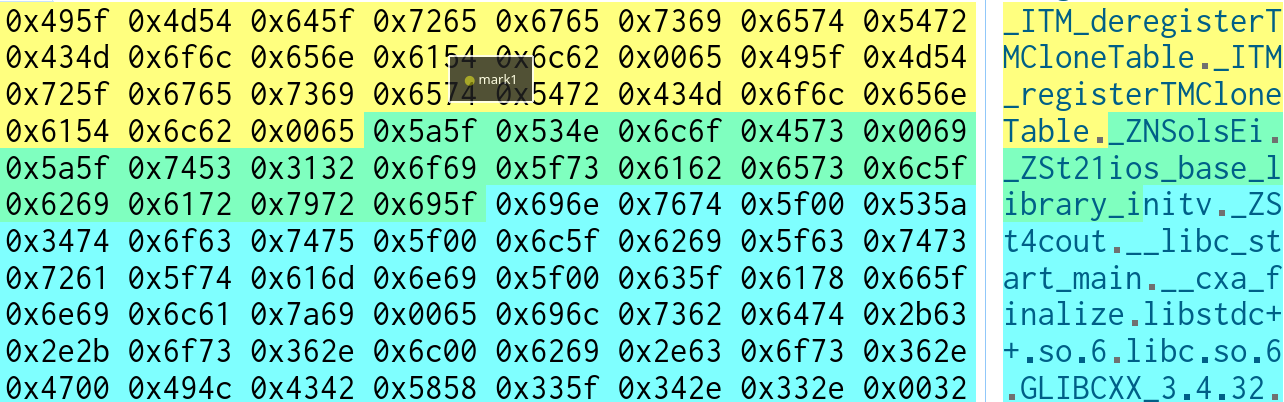
If multiple marks overlap at the same address, the tooltip lists them all line by line, with priority given to the most recently added mark.
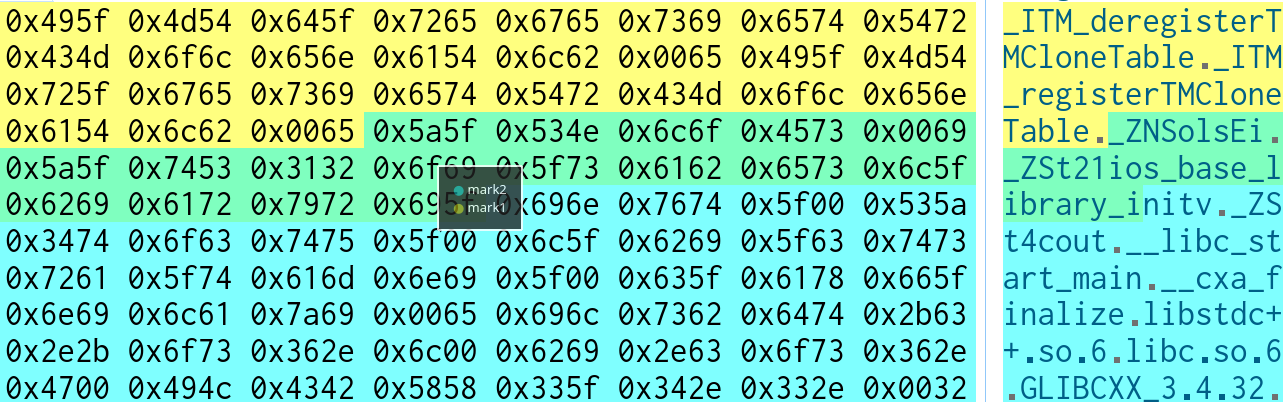
The tooltip is designed to follow the cursor. This was achieved with a small trick: first set the QToolTip text to the intended text plus a trailing space, and then immediately update it with the actual text. This forces Qt to redraw the tooltip at the new cursor position while keeping the content unchanged.
Removing and Editing Overlapping Marks
Since our feature now supports overlapping marks, we needed a way to remove or edit a mark that is completely contained inside another mark. Previously, the only way to access such a mark was by first removing the marks on top of it and then re-adding them, which was inconvenient.
To solve this, the Remove and Edit actions in the context menu now list all of the marks present at the selected address along with their names. This allows the user to directly choose which mark to edit or remove without disturbing the others.
Challenges
Everything worked fine until we hit an issue: whenever the cursor moved inside a highlighted mark range, the background reverted to Cutter’s default color instead of staying with the mark’s highlight. This happened because the cursor redraw overwrote the background each time it moved.
If there was only one mark at the cursor address, fixing this would be easy: just query the mark and repaint the background with its color. But since multiple marks can overlap at the same address, we needed a smarter approach. To solve this, we introduced a helper function getBlendedMarksColorAt() inside CutterCore, which calculates the final blended color for all marks at a given address.
Future Improvements
A cool idea for future work could be to create another tab alongside the Parsing and Information tabs in the right panel, dedicated to Marks. This tab would display all added marks in a table-like view with their names and allow quick interaction.
Clicking on a mark would open its details (such as comment, color, etc.) and provide options to directly edit or remove it without needing to use the right-click context menu. Additionally, double-clicking on a row could automatically move the cursor and viewpoint to the starting address of the selected mark, making navigation much faster and more intuitive.
And also extend Marks support to different widgets (Disassembly, Graph, etc.).
Conclusion
The integration of the Rizin Mark API in Cutter enables adding, editing, and managing overlapping marks directly in the Hexdump. With tooltips and context menu actions, it streamlines annotating binaries while leaving room for future enhancements.
This was no doubt a great learning experience, and at the end I would like to thank @xvilka for this amazing opportunity and also @karliss and @deroad for the help and guidance.

